iOS Custom Pull-to-Refresh Control Tutorial (Updated for Swift)
What’s the worst part about any internet technology? Wait times. Loading screens. Progress bars that drive you to smash your printer and spike your iPhone.
On the technical side, some things you can do to reduce response times is optimize backend logic or implementing cache policies. But many times there’s factors outside of our control, especially if we’re integrating external services.
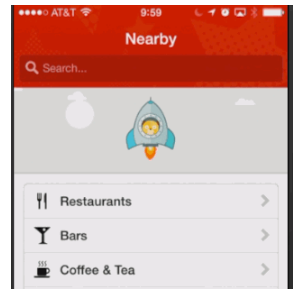
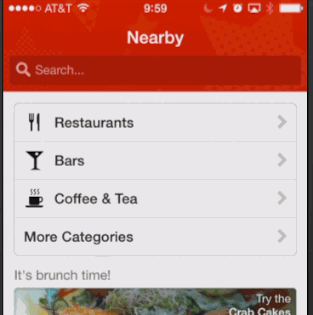
The flip side, which is always under our control, is to keep the user occupied on the front-end. Use these loading headers to engage your user. They’re a nice surprise, and great touch of detail. Much better to have your audience saying “oooh, that’s cool”, instead of “c’mon, this app is so slow!”. A couple of my favorite examples are Yelp and Snapchat.
The Concepts
Finally in iOS 6, after everyone and their brother started implementing custom pull-to-refresh controls, Apple enhanced their UITableViewControllers to include the UIRefreshControl. This is the expandable component you see stretched in the header section when a user pulls and invokes the refresh.
There’s many ways to implement this sweet piece of polish. For simplicity, we’re just going to jam a few subviews and images into this UIRefreshControl that will move as we pull, and manipulate a few color properties. Opacity, animations, and more. Follow along =).
The Math
Here, what we have is a view that is being stretched by the user’s pull, up to a threshold. When that threshold is reached, refresh is invoked, and the request is sent. When this happens we perform an animation. On successful response, error, or timeout, this refresh view is hidden.
This following example are my sketch notes from a hackathon project our team built. At the time we couldn’t find any tutorials or documentation on how to do this — so I wrote one =). We’ll derive some math from these.
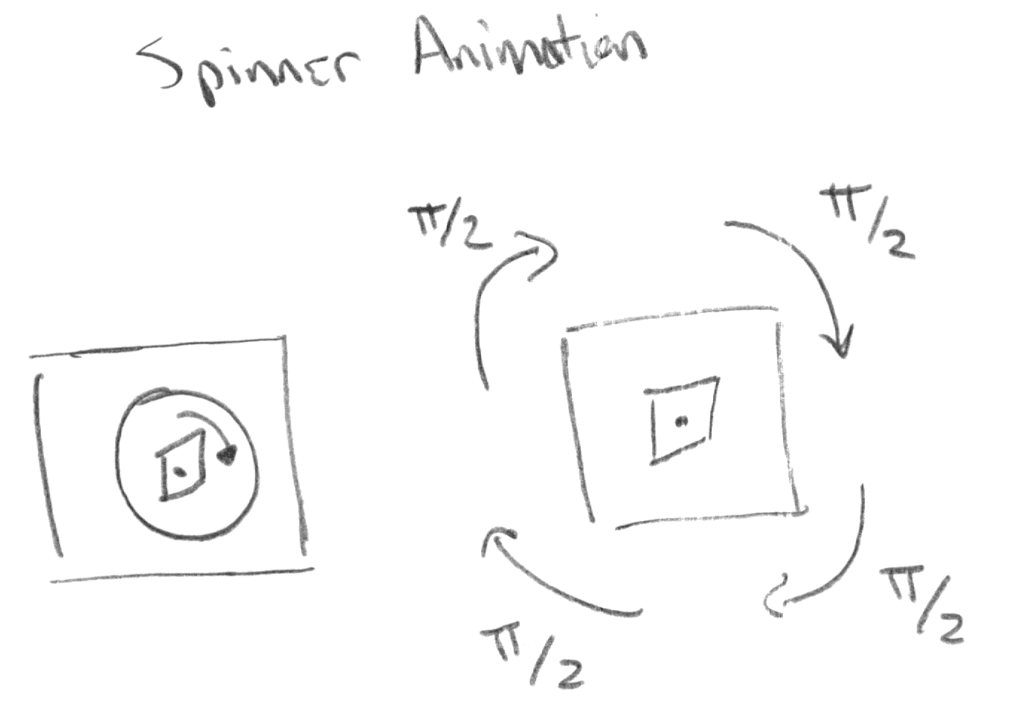
Here, as the user pulls, we have two graphics for indicating the refresh invocation. We use a compass icon, sliced into the compass background, and the spinner. These graphics are designed to overlap when we reach the refresh threshold. When we reach that threshold they must overlap and stay together. Upon refresh, we have the spinner perform a rotation animation. On completion, the compass will break apart and hide as the view disappears. See the following graphic.
Pull-to-refresh states
You can see there are a few refresh states we’ll handle.
1. Pulling
2. Releasing
3. Connected
4. Animating
5. Exiting
The Code
First, we’re going to set up our loading headers when the view loads. We initialize our UIRefreshControl, and set it’s background to clear to hide the boring native loading spinner. We also set clipsToBounds, so our graphics don’t stick out.

Inside of that UIRefreshControl, we add UIView refreshLoadingView to hold our graphics which we’ll be moving and animating, and refreshColorView to flash background colors. The reason we use a separate UIView to change the color background is so that we can adjust it’s alpha property independent of the rest of our graphics. Alpha is the transparency property.
[tabbed_section]
[tab title=”Objective-C” id=”1-t1″]
[/tab] [tab title=”Swift” id=”1-t2″]
[/tab]
[/tabbed_section]
Then we add a target, when the UIRefreshControl hits the threshold, on the event UIControlEventValueChanged, we invoke our refresh function. In your app, this is where you’ll make an API call, or do something interesting. In our example, we’re just going to wait for 3 seconds, to simulate a network request.
[tabbed_section]
[tab title=”Objective-C” id=”2-t1″]
[/tab] [tab title=”Swift” id=”2-t2″]
[/tab]
[/tabbed_section]
Now that our views are set up, we can position our loading graphics, the compass and the spinner, to move based on the distance the table is pulled.
Since UITableView is a subclass of UIScrollView, we can use it’s delegate method, scrollViewDidScroll, to be notified every time the table scrolls.
We start by finding the distance the table has been pulled, by getting the bounds of the UIRefreshControl, which expands and contracts accordingly. From there we calculate the pullRatio, or the ratio of the distance pulled, to the distance needed to invoke the refresh. The further we pull, the closer we want to get to the refresh, and the larger this value.
In this scenario, the compass and the spinner begin separated from each other, and as the table is pulled, they get closer together. The goal is to have them overlap in the middle when the refresh threshold is reached. So since we’re approaching the middle, our calculations will be based off this center value, midX.
With graphics and the iOS coordinate system, the X value is the top-left corner of the graphic. If we just assigned the graphics X coordinate to the center value, then it’s top-left corner would be centered, but the graphic as a whole would not be. Therefore to center the graphic, we set it’s X coordinate to this midX, offset by half the width of the graphic, compassWidthHalf.
Therefore, to center our graphics they would be positioned as such:
compassX = midX – compassWidthHalf;
spinnerX = midX – spinnerWidthHalf;
As our graphics move, and before they overlap, we position them according to the following equations. The graphics both start where the pullRatio = 0, and the table has not yet been pulled. There, they begin positioned offset 1 width from the center. As the table moves, pullRatio increases, and the graphics approach the center.
compassX = (midX + compassWidthHalf) – (compassWidth * pullRatio);
spinnerX = (midX – spinnerWidth – spinnerWidthHalf) + (spinnerWidth * pullRatio);
As the graphics move, we test to see if they have overlapped, by checking if they’re positioned within a pixel from each other. Once they overlap, we want to keep them together, so we set our flag isRefreshIconsOverlap. We also want to keep the graphics overlapped while the refreshing is occurring. This is done by checking the UIRefreshControl with refreshControl.isRefreshing.
Finally, if we’ve detected that we’re refreshing, then we want to execute our animation. For our animation here, we’re going to rotate the spinner and animate the background colors.
The animation is done with UIView’s animateWithDuration method. We provide it with an animation block, where we rotate the spinner by setting it’s transformation matrix. Don’t worry about the math here, just understand the rotation function: CGAffineTransformRotate(self.compass_spinner.transform, M_PI_2). Here we input the current transformation matrix, and set the rotation 90 degrees, or PI/2. Note that this only rotates a quarter turn, so four invocations will be a full rotation. Therefore in our completion method we recursively call this rotation function, if we’re still refreshing. Our animation will continue running, 90 degrees at a time, until complete. We are also cycling through background colors with our colorArray.
[tabbed_section]
[tab title=”Objective-C” id=”3-t1″]
[/tab] [tab title=”Swift” id=”3-t2″]
[/tab]
[/tabbed_section]
Putting all of these pieces together, we achieve our intended effect. When the animation is complete, we call resetAnimation to clear our background color and flag variables.
Conclusion
So those are the concepts, and one way to implement these refresh loading animations. They’re an awesome touch of detail, and I hope they can spiff up your apps.
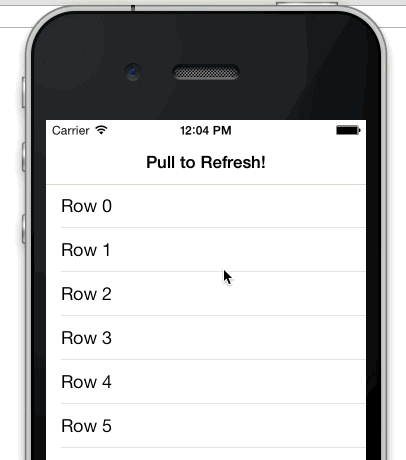
Checkout the following animation for the final product. And hit the Github link below to grab the code. Enjoy!
Github
Objective-C: https://github.com/JackrabbitMobile/JackrabbitRefresh
Swift: https://github.com/JackrabbitMobile/JackrabbitRefreshSwift
Ooooh. Ahhhh! Hope you enjoyed our iOS Custom Pull-to-Refresh Control Tutorial =)